Setting up Your Peer-to-Peer Fundraising Campaign

RKD Group’s Donor Marketing Cloud (DMC) is built to serve the unique needs of nonprofit organizations. Our easy-to-use platform helps you manage your digital fundraising and marketing campaigns, and it elevates those campaigns with modern payment solutions, personalization, and seamless digital experiences. 

This guide will walk you through the steps you’ll need to set up a peer-to-peer fundraising campaign within the DMC: 

Authentication 
Login and Setup 
Team Captains vs. Team Members 
Managing Your Page(s) 
Start Sharing! 

Authentication 

  • Navigate to the campaign’s home page 
  • Click Become a Fundraiser -> Sign Up 
1-3

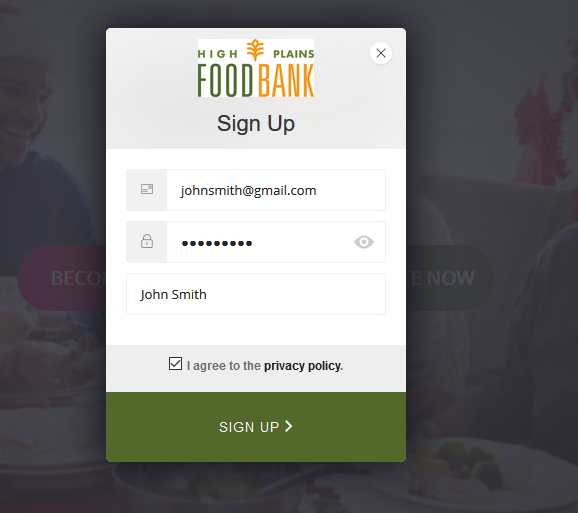
  • Enter your email address, password, and full name
2-Nov-24-2020-09-10-34-59-PM

  • Review the associated privacy policy
  • Check the box acknowledging that you agree to the terms of the privacy policy


3-4

  • Navigate to your email inbox and click the confirmation link to authenticate your email
  • This will send you to the homepage and display “Success, your email is now verified. Please login to create your team or individual page. You may also join an existing team."


44

Login and Setup

  • Click the “Login” button and enter the email address and password provided in the authentication stage above
  • After signing in, you will see an icon with your first and last initial in the top right of the page
  • Click “Become a Fundraiser” and choose from the following options:
    • “Start a team” (start a new team)
    • “Find/Join a Team” (join an existing team)
    • “Join as an Individual” (no teammates)


1-4

  • Depending on the option selected above, you will be prompted to answer the necessary questions associated with the campaign, including but not limited to:
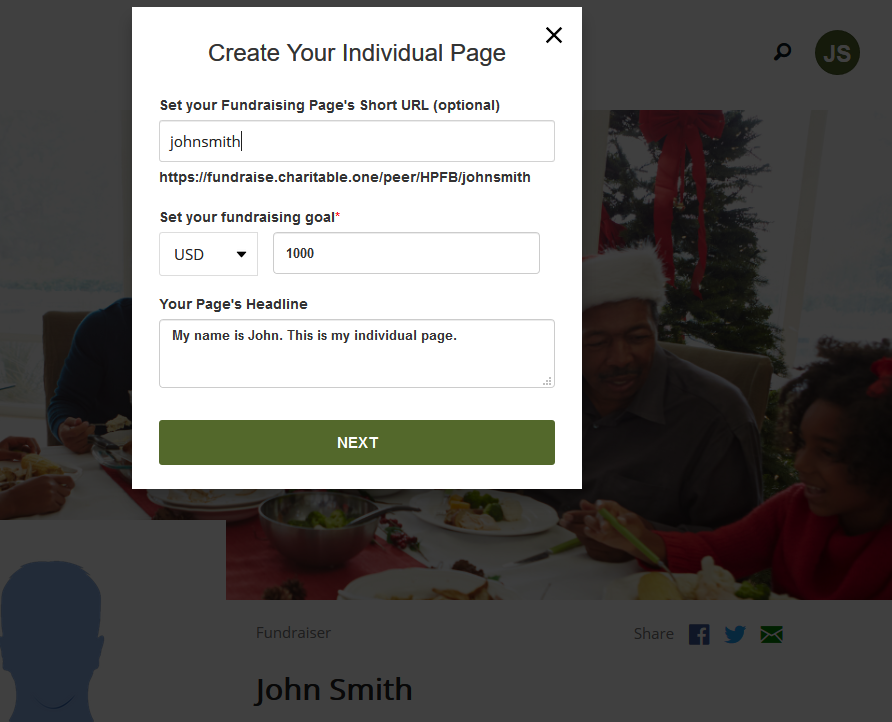
    • Short URL (optional – this allows you to create a unique, shortened link to your page that you may choose to share with others)
    • Goal (designate a fundraising goal for your team or for your individual page)
    • Page headline (team or individual - see screenshot below)
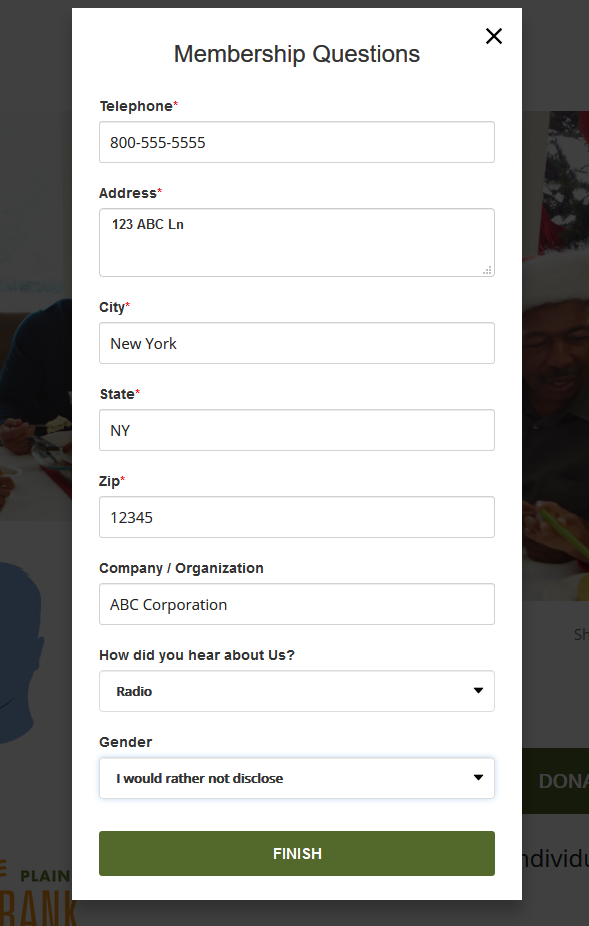
  • After creating your page, you will be asked to complete the associated Membership Questions (fields with a red asterisk are required to be completed before finishing your page(s)’ setup)


2-Nov-24-2020-09-15-52-37-PM
3-Nov-24-2020-09-15-54-48-PM

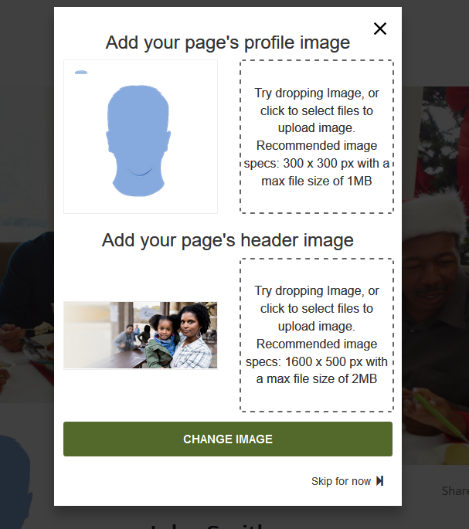
  • You will also have a chance to designate images for your page(s) or opt to skip for now and update them later:
    • Profile Images
    • Header Images


4-Nov-24-2020-09-15-55-69-PM

  • After completing the steps above, you will see a “Success! Your page is being created...” message
  • Click the “OK” button to proceed to your page

Team Captains vs. Team Members

Team Captains

  • The first set of questions you answer will be specific to your team page
  • The first profile image and header image you are prompted to upload will apply to your team page
  • You will be prompted to create an individual page if you have not already
  • You will be prompted for a page headline and goal that will be associated to your individual page
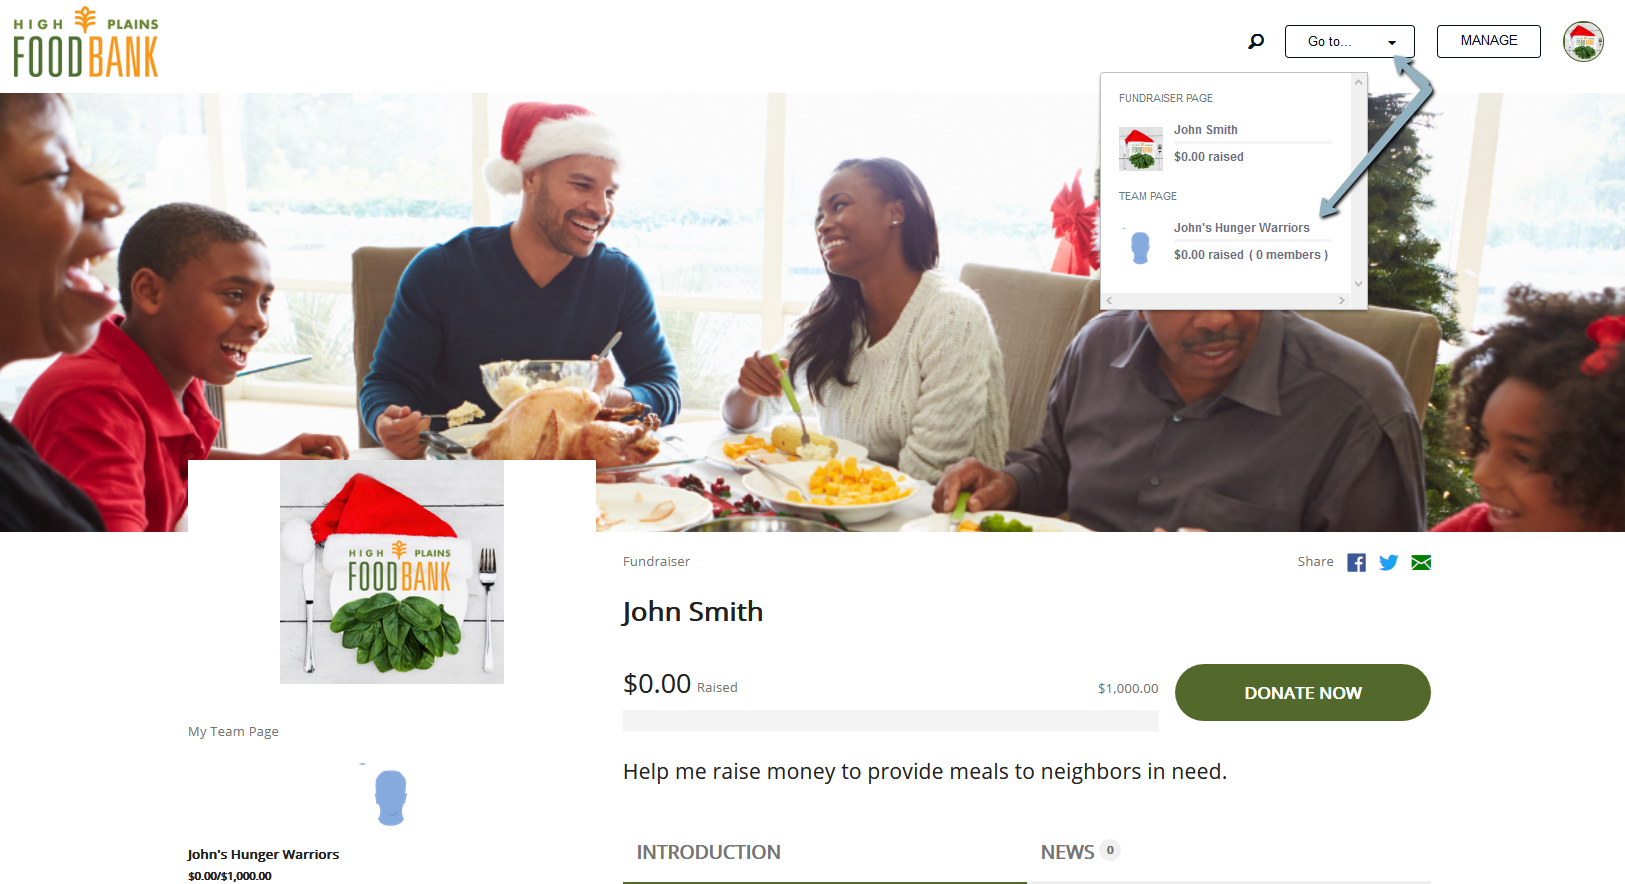
  • After setting up your pages, you will arrive at your individual page at the end of the process. Click “Go to…” in the top right to navigate to your team page
1-Nov-24-2020-09-26-57-32-PM

  • You will be able to upload a separate profile image and header image for your individual page
    • If you do not wish to change your images, you may click “Skip for now,” and the default images provided will be used
    • You may update your team’s and your individual page’s profile images after the setup process is complete

Team Members

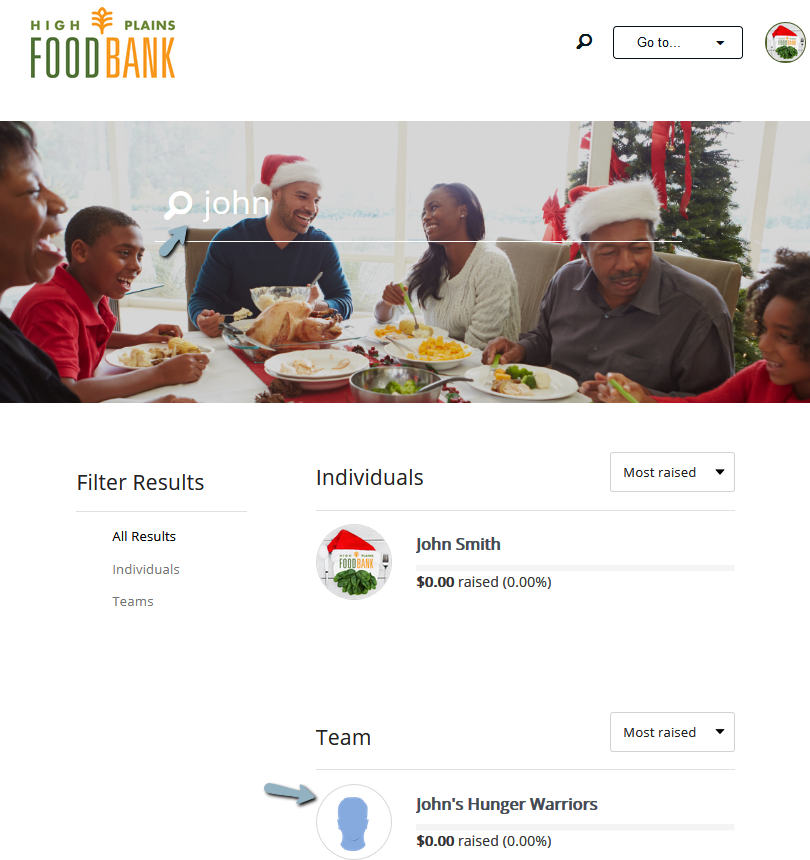
  • You may find the team that you are looking for by navigating through the team directory, searching by team captain or team name
  • You will be shown a message indicating that any progress made on your existing individual page will be counted toward the team’s progress that you are joining from the point of joining forward
  • You will be prompted to create an individual page if you have not already
  • Provide a team goal and short URL for you page (optional)
  • Provide any images for your individual page (or skip for now)
  • After finishing, you will be viewing your individual page
    • Navigate to the home page by clicking the campaign logo in the top left and use the search tool or dashboard to locate the team page that you joined and view it


2-Nov-24-2020-09-27-03-32-PM
3-Nov-24-2020-09-27-00-23-PM

Managing Your Page(s)

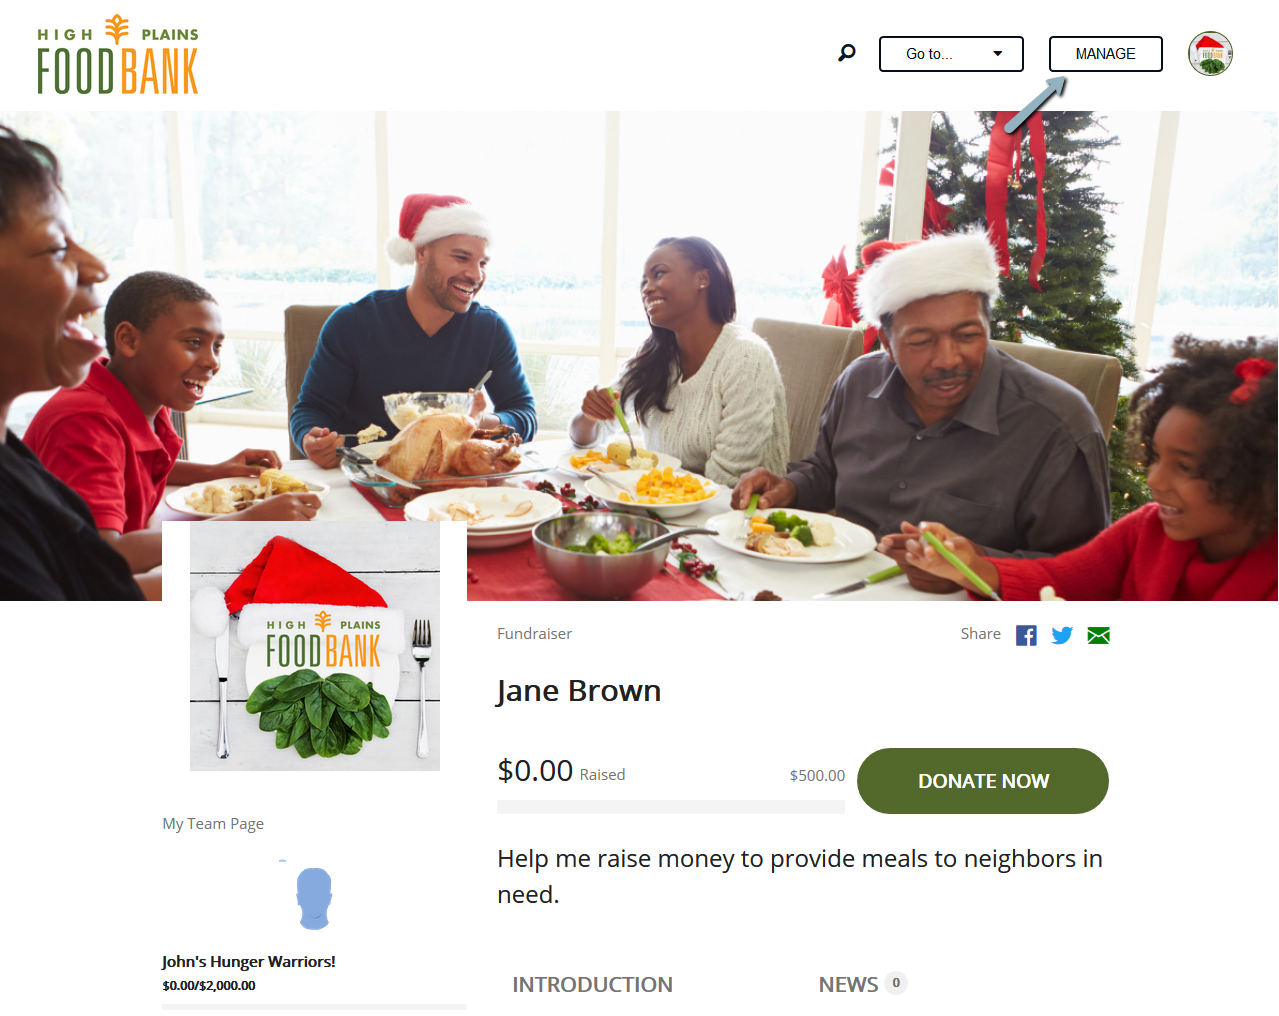
  • You may now click “Go to ...” in the top right to navigate to both your Fundraiser (Individual) Page and your Team Page
  • Manage your pages by clicking "Manage" in the top right


1-Nov-24-2020-09-33-01-54-PM


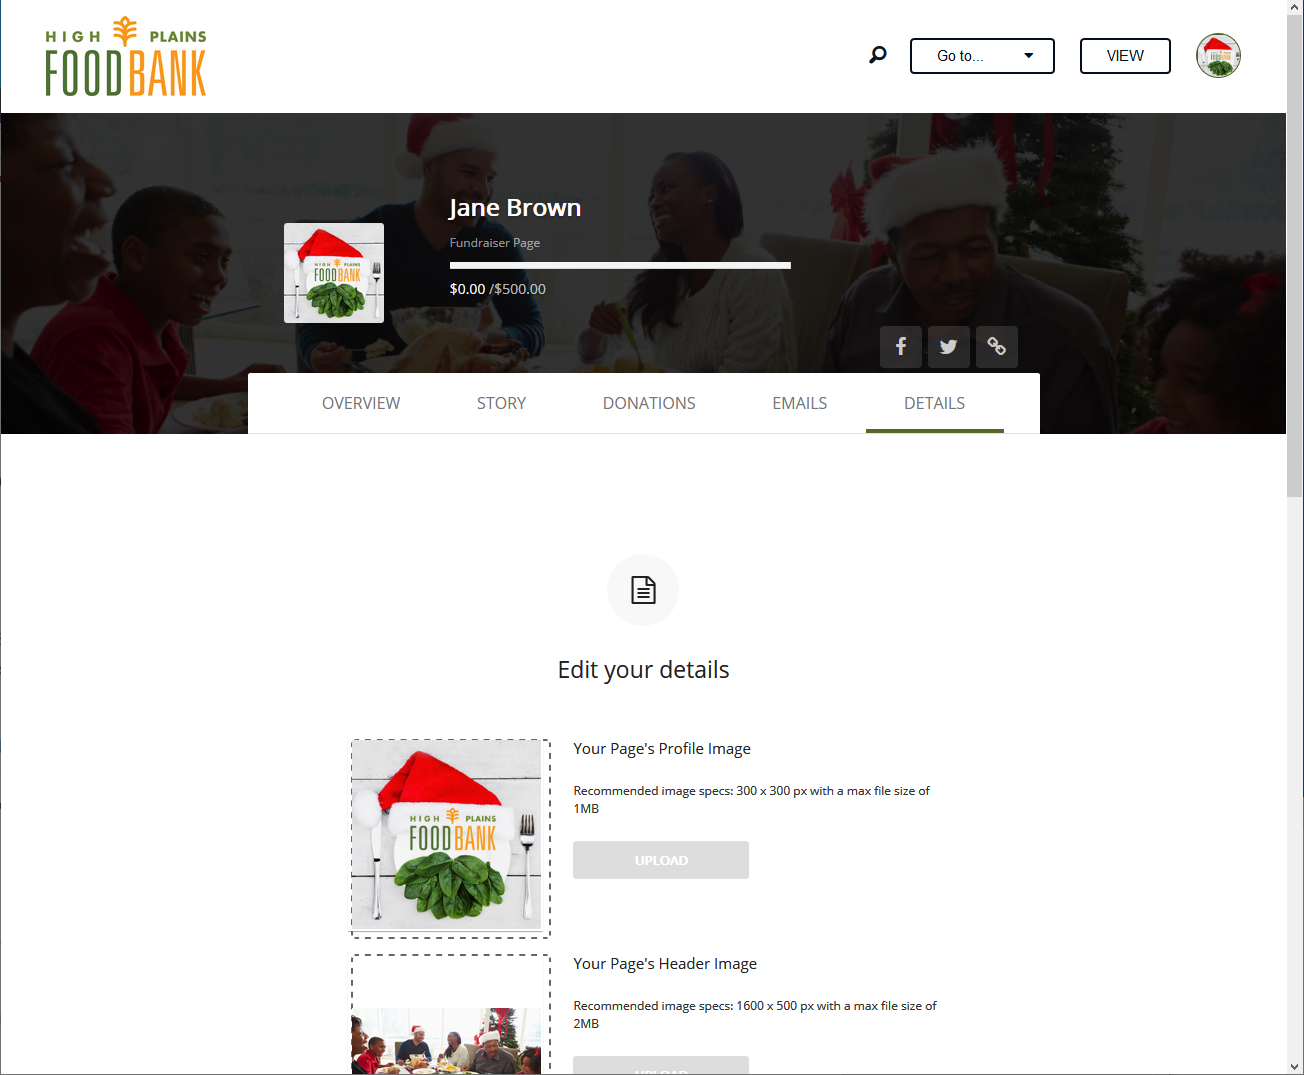
  • Here you may navigate to:
    • Story – Update your team or individual page's story to explain why you joined the campaign
    • Teammates (Team pages only) – View and Manage Your Team 
    • Details – Update your page's profile or header image, team name, page name, goal, headline, short URL and more!


2-Nov-24-2020-09-33-19-25-PM

Start Sharing!

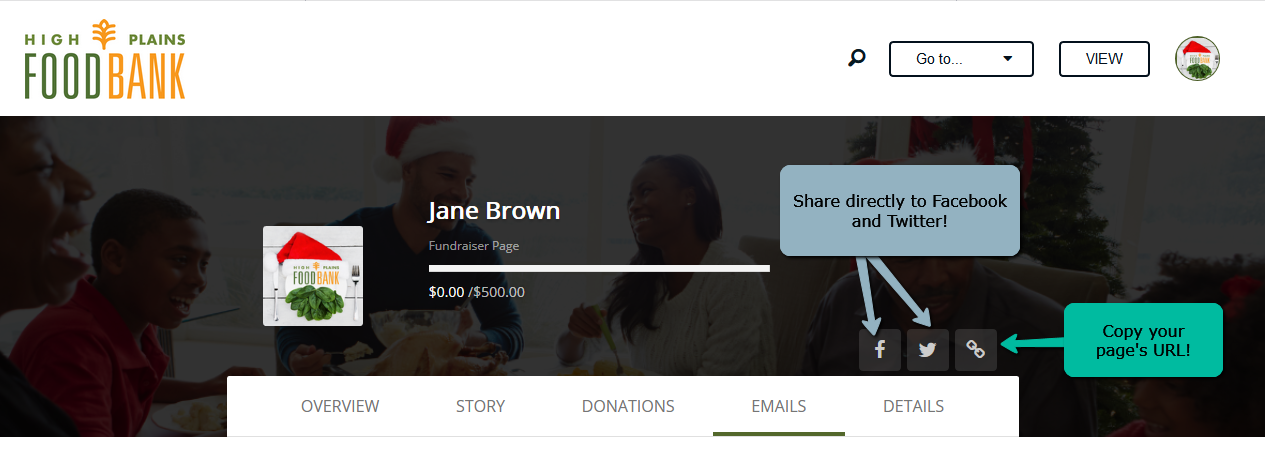
  • After updating your individual and/or team page(s) to your liking, use the Facebook or Twitter icons to share your page(s) on social media


1-1-1

  • We recommend that you use the green email icon option to share your fundraising page(s) with your friends, family, classmates and colleagues
    • This will start an email from your personal email address that includes a link to your page
    • An email from your personal email address is much more likely to be opened and result in donations!


1-Nov-24-2020-09-35-07-34-PM

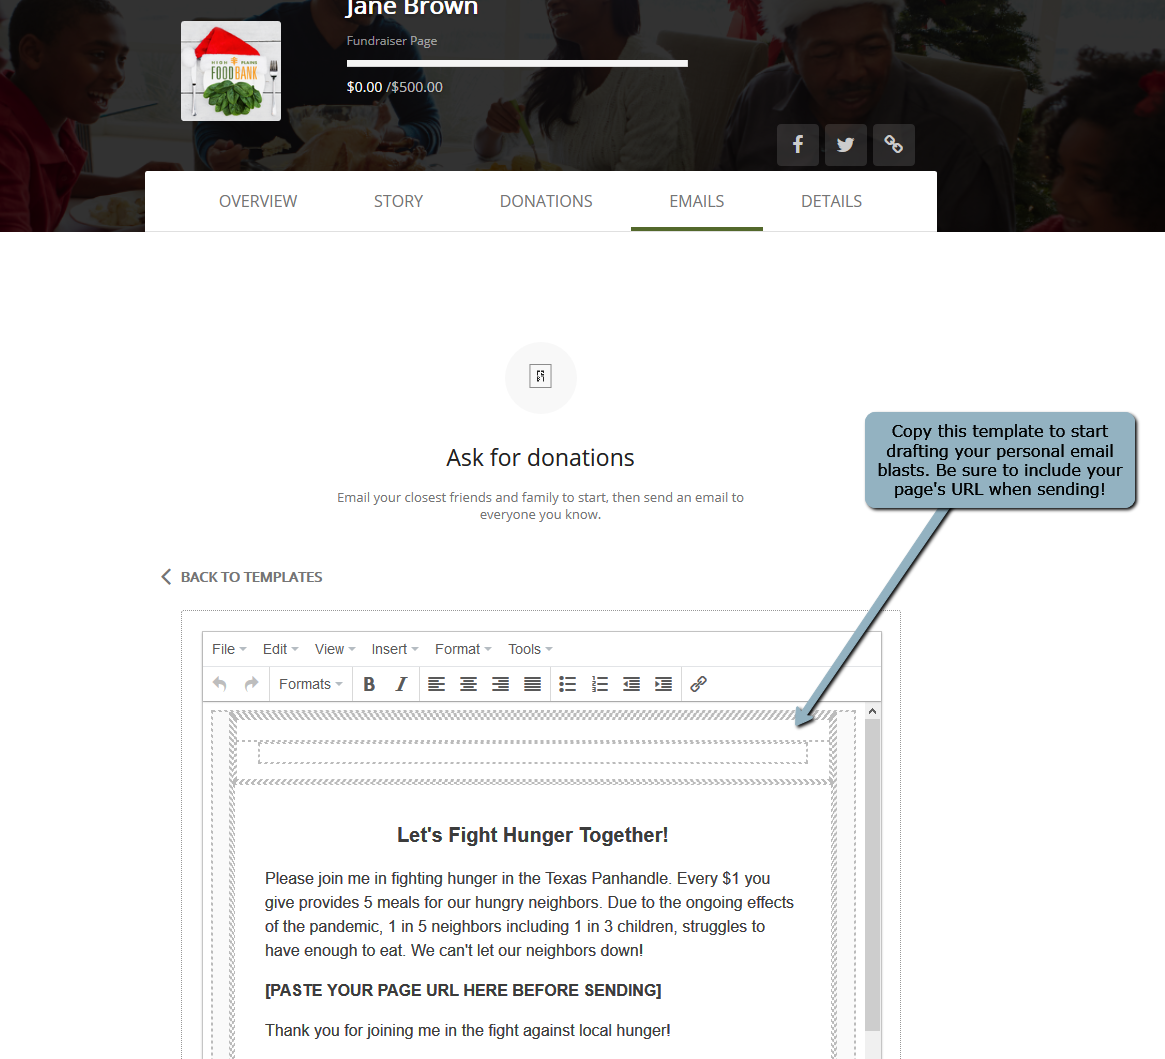
  • If you are having trouble generating email content for your personal ask, navigate to Manage on your individual page -> Emails and copy the content provided into your email, updating it to fit your style and being sure to include the link to your page(s)


2-Nov-24-2020-09-35-08-20-PM


For additional help, please contact us at DMCsupport@rkdgroup.com.